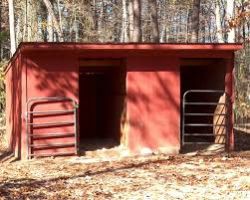
Quaker Lumber Shed Designing Blueprints - Factors To Assess When Crafting A DIY Shed

When creating garden outbuilding schematics you can provide for some fairly simple precautions to drastically cut your chances of your shed being vandalized ( website here ). When you are not using your outbuilding be sure to lock it securely. If your outbuilding is visible from your home you can install lighting which can be triggered by movement sensors. A secure perimeter around your property will also help deter thieves. Use curtains to cover any windows to conceal valuable materials when you aren’t using your outbuilding. outhouse doors are notoriously easy to break open so strengthen them with heavy screws and bolts. Get your property and tools engraved or mark them with paint or another permanent ink. You will better be able to get your property returned while also deterring thieves with prominent labeling. You can strengthen your outbuilding’s resistance to vandals by fixing additional panels to the internal structure. Use a metal cage and keep it locked when your shed is unattended to ensure valuable equipment is safe.
Insulation can be harsh to work with so always wear a dust mask and gloves ( content ). You must start by measuring the interior height of your walls. Treated plastic liners have other uses but typically act as an insulating barrier against air. Anyone can install plastic lining plus it is really simple to handle. Drafts of cold air from outside will have a harder time entering the outhouse once the barrier is in place. Layer and overlap the plastic air barrier on the walls in the outhouse fastening as you go. Place whatever kind of siding the outhouse drawings call for to use atop of the air barrier. To guard against gases and other vapors it is a good idea to use fiberglass insulation. Cover the fiberglass with more wall material once it has been laid against the wall. You can conceal the insulation with painted drywall sheets secured with 1-inch drywall screws.
Insulation can be harsh to work with so always wear a dust mask and gloves ( content ). You must start by measuring the interior height of your walls. Treated plastic liners have other uses but typically act as an insulating barrier against air. Anyone can install plastic lining plus it is really simple to handle. Drafts of cold air from outside will have a harder time entering the outhouse once the barrier is in place. Layer and overlap the plastic air barrier on the walls in the outhouse fastening as you go. Place whatever kind of siding the outhouse drawings call for to use atop of the air barrier. To guard against gases and other vapors it is a good idea to use fiberglass insulation. Cover the fiberglass with more wall material once it has been laid against the wall. You can conceal the insulation with painted drywall sheets secured with 1-inch drywall screws.
You must frame the exterior walls of your outbuilding for full support and stability. To build a wall frame you will need 2x4 pieces of wood and either nails or screws. Start by cutting the wood for the back wall to the size you want according to your diy shed plans. Forming a frame is easy once you attach all the cut wood sections together with fasteners. The key to easily framing the exterior outhouse walls is to make sure the walls are square and level. Once the wall is level you can support it by spacing the remaining 2x4s two feet apart from each other inside the frame. Add ¾-inch plywood to make your frame sturdier and more durable. Once finioutbuilding with the back wall turn it over and you will be ready to mount it. Follow suit with the remaining walls and be sure you are leveling the angles at all times. Hoist the remaining walls after you have erected the rear wall.
If you want to use a outbuilding for more than just storage you will want to include electricity in the shed blueprints ( quaker lumber shed designing blueprints ). Your outbuilding plans should include domestic electrical regulations as they are in place to protect you. Easy and especially safe cables to use when running electricity are steel wired cables or SWA. You can easily hide unsightly cables by burying your wires underground. You must consider that sinking the wire below ground means you need to bury it to a depth of at least one meter. Your garden shed crafting blueprints can also utilize solar panels to acquire power in your outbuilding. Using a solar panel will mean that you need to place it where sufficient light reaches it between 11 am and nightfall. Most solar kits come with roof mounts that you can use to easily install the panel. Bolt the support rails horizontally across the bottom of your solar unit and attach a cable. Wind turbines can also be a useful source of power for any outbuilding when there is less solar power available.
