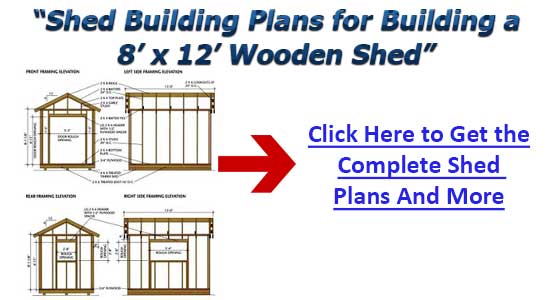
Shed Plans Blueprints - Proper Steps to Construct a Perfect Shed
Outbuildings made of treated wood are an attractive option for your outbuilding
You shed construction schematics can include the growing popularity of treated wooden outhouses ( place to see on schematics ). Prefabricated outhouses are constructed of wood and covered with a high quality plastic material that makes the outbuilding light yet still durable. Prefabricated outbuildings are basically maintenance free because they never need painting and will not rust. You can find wood outhouse kits available in a variety of sizes and some companies even offer expansion kits. Using a wooden shed kit is an easy task and it costs less than its plastic or metal counterpart. Wooden outhouses are extremely strong and can bear a lot of weight on their walls. Some models include an overhead loft area which allows more storage. Some manufacturers use combined support and a double-wall wooden panel construction for complete resilience. You will be able to paint and shingle your wooden outbuilding to match your house or mood. Another bonus of manufactured sheds is that they are virtually effortless to renovate.
Be sure to select the most appropriate site when putting together your outbuilding
Selecting the proper site for your outbuilding is half the battle when making your garden outbuilding crafting blueprints ( schematics for crafting a pole shed ). Never build a shed at the bottom of a hill or any area that collects and contains moisture. Most cities recommend that you follow their building guidelines with regards to your property line. Putting your storage outbuilding into the deepest back corner of the yard may seem like smart idea but should be avoided. To make your outbuilding more accessible it is best to build it in a reachable area. People will have the tendency to return tools to your outbuilding when it is in an easily accessible area. When there is a difference in elevation you should be sure that the entrance outbuilding is on the side that is higher. It will be easier to step into the shed if the door’s threshold is closer to the ground. When possible avoid placing your outbuilding in areas that are covered by shrubbery. Exposure to direct sunlight and breezes will prolong the life of your building.
Be sure your outbuilding is secure and safe in order to prevent theft of your tools
In your outbuilding diagrams make sure your shed is safe and secure by adding some easy safeguards. Fit your door and window with good bolts and make sure that you lock it every time. If your outhouse is visible from your home you can install lighting which can be triggered by movement sensors. Secure and fortify the area around your shed to protect all of your possessions. Obscure the windows of your outbuilding to prevent potential thieves seeing what you have inside. shed doors are notoriously easy to break open so strengthen them with heavy screws and bolts. Get your property and tools engraved or mark them with paint or another permanent ink. You will better be able to get your property returned while also deterring thieves with prominent labeling. Reinforce your outbuilding from the inside to make it more resistant to a break-in. Ladders and spades should be secured to a strong fixed object as they can be used by thieves to gain access to other areas.
In your outbuilding diagrams make sure your shed is safe and secure by adding some easy safeguards. Fit your door and window with good bolts and make sure that you lock it every time. If your outhouse is visible from your home you can install lighting which can be triggered by movement sensors. Secure and fortify the area around your shed to protect all of your possessions. Obscure the windows of your outbuilding to prevent potential thieves seeing what you have inside. shed doors are notoriously easy to break open so strengthen them with heavy screws and bolts. Get your property and tools engraved or mark them with paint or another permanent ink. You will better be able to get your property returned while also deterring thieves with prominent labeling. Reinforce your outbuilding from the inside to make it more resistant to a break-in. Ladders and spades should be secured to a strong fixed object as they can be used by thieves to gain access to other areas.
A well made roof for your outbuilding is possible if you first build roof tresses
It is important to note that roof trusses are essential to any storage shed diagrams since they stabilize the whole building ( shed plans blueprints ). For easier installation it is best that you assemble all your timber on a concrete floor horizontally. Choose a sunny day to start working on your roof truss so that you don’t get any timber damp. Framing a roof in the traditional manner using individual rafters can be a challenge for someone who has never tried. With prebuilt roof trusses you will cut out most of the work on the ladder. Most trusses will come with two manufactured rafters attached to a joist. All parts of a truss are held together with plywood gusset plates. Position your trusses at least sixteen inches apart when installing. Fully built trusses are available and are reasonable for any outdoor shed crafting diagrams as they are very cost-effective. You can find many different kinds of prebuilt trusses in any home center.
It is important to note that roof trusses are essential to any storage shed diagrams since they stabilize the whole building ( shed plans blueprints ). For easier installation it is best that you assemble all your timber on a concrete floor horizontally. Choose a sunny day to start working on your roof truss so that you don’t get any timber damp. Framing a roof in the traditional manner using individual rafters can be a challenge for someone who has never tried. With prebuilt roof trusses you will cut out most of the work on the ladder. Most trusses will come with two manufactured rafters attached to a joist. All parts of a truss are held together with plywood gusset plates. Position your trusses at least sixteen inches apart when installing. Fully built trusses are available and are reasonable for any outdoor shed crafting diagrams as they are very cost-effective. You can find many different kinds of prebuilt trusses in any home center.
